How to create a video upload platform using Ruby on Rails – Part 2

Welcome back to part 2 of How to create a video upload platform using Ruby on Rails. In Part 1, we worked on setting up the basic Ruby on Rails application that allowed us to upload, store, and playback video files from our app. In this next part, we are going to enhance that process some by adding some FFMPEG Transcoding. This way, we can get all videos that are uploaded converted into a common format that will make it easier to work with on the playback side.

So lets get started. The first thing we need to do is make sure we have ffmpeg installed. On mac this is pretty simple using brew. If you don’t have HomeBrew installed, please follow the directions at https://brew.sh/. If you are on another linux or windows system, there are many guides online to help set ffmpeg up for you. Once you have that installed, we can install the ffmpeg command:

brew install ffmpeg

I decided to install a lot of the extra ffmpeg options to make sure I had the best compatibility. Here is a more complete line

brew install ffmpeg --with-chromaprint --with-fdk-aac --with-libass --with-librsvg --with-libsoxr --with-libssh --with-tesseract --with-libvidstab --with-opencore-amr --with-openh264 --with-openjpeg --with-openssl --with-rtmpdump --with-rubberband --with-sdl2 --with-snappy --with-tools --with-webp --with-x265 --with-xz --with-zeromq --with-zimg

Once you have ffmpeg installed and running we need to add the carrierwave-video gem to our project:

# Gemfile
gem "carrierwave-video"

Next, we need to update our upload to include this new library. Open the app/uploaders/video_uploader.rb file and add the following include line to it:

class VideoUploader < CarrierWave::Uploader::Base
 include CarrierWave::Video # <== Add this line here
 
 ...

In order for Carrierwave to actually encode the video, we need to also add a line that instructs it to do so. Lets also adjust the resolution while we are at it.

class VideoUploader < CarrierWave::Uploader::Base
  include CarrierWave::Video

  process encode_video: [:mp4, resolution: "640x480"]

  ...

The last thing we need to do is change the file extension. If we upload an avi or mov file, we convert that to mp4 but with Carrierwave it will maintain the original extension. So add the following lines right after the process line added above

def full_filename(for_file)
  super.chomp(File.extname(super)) + '.mp4'
end

def filename
  original_filename.chomp(File.extname(original_filename)) + '.mp4'
end

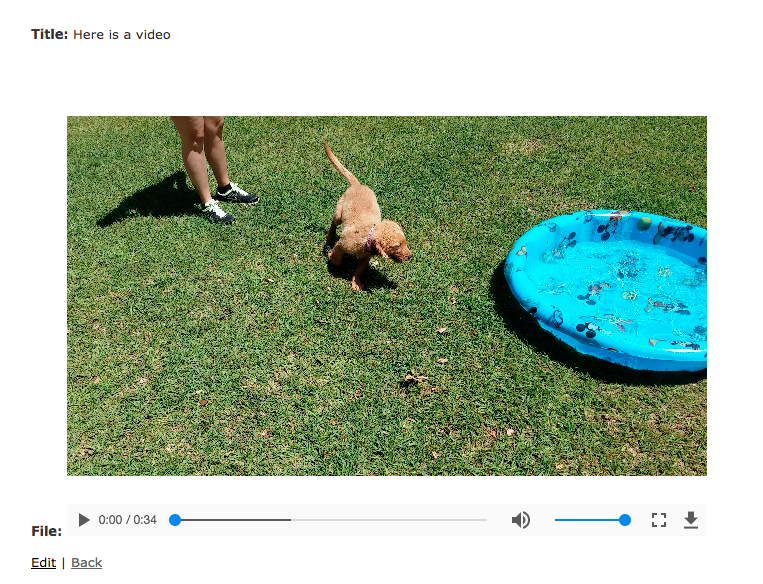
Fire up your Rails app and upload a video just like we did in Part 1. You should see the following in your Rails console. Notice the line Running transcoding...

Started POST "/videos" for 127.0.0.1 at 2018-05-17 09:41:10 -0400
Processing by VideosController#create as HTML
  Parameters: {"utf8"=>"✓", "authenticity_token"=>"pCgWw3lxulQ9qiGxfck5oqFXgQo0tqO7gG371YEbFaiiRMdAc98uPGQCvTYzn0/Kub/pQtQI9n95I+grmGvQ6w==", "video"=>{"title"=>"adf", "file"=>#<ActionDispatch::Http::UploadedFile:0x007fbb5f814be8 @tempfile=#<Tempfile:/var/folders/__/7ns9m_817l71zfd0xw5618n00000gn/T/RackMultipart20180517-60568-c6cwal.mov>, @original_filename="step.mov", @content_type="video/quicktime", @headers="Content-Disposition: form-data; name=\"video[file]\"; filename=\"step.mov\"\r\nContent-Type: video/quicktime\r\n">}, "commit"=>"Create Video"}
I, [2018-05-17T09:41:10.439284 #60568]  INFO -- : Running transcoding...
["/usr/local/bin/ffmpeg", "-y", "-i", "/Sites/VideoSite/tmp/1526564470-60568-0006-7430/step.mov", "-vcodec", "libx264", "-acodec", "aac", "-s", "640x480", "-r", "30", "-strict", "-2", "-map_metadata", "-1", "-aspect", "1.3333333333333333", "/Sites/VideoSite/tmp/1526564470-60568-0006-7430/tmpfile.mp4"]

I, [2018-05-17T09:41:17.640387 #60568]  INFO -- : Transcoding of /Sites/VideoSite/tmp/1526564470-60568-0006-7430/step.mov to /Sites/VideoSite/tmp/1526564470-60568-0006-7430/tmpfile.mp4 succeeded

   (0.3ms)  begin transaction
  SQL (0.3ms)  INSERT INTO "videos" ("title", "file", "created_at", "updated_at") VALUES (?, ?, ?, ?)  [["title", "adf"], ["file", "step.mp4"], ["created_at", "2018-05-17 13:41:17.643006"], ["updated_at", "2018-05-17 13:41:17.643006"]]
   (1.0ms)  commit transaction
Redirected to http://localhost:3000/videos/1
Completed 302 Found in 7260ms (ActiveRecord: 1.6ms)


There we go. We are now successfully encoding the video file to a common format using ffmpeg. In the next part we will look at moving this process to the background so that we don’t force the user to wait on the transcoding, and add some status indications of how the progress is going. Until next time!

How to create a video upload platform using Ruby on Rails – Part 1

Lets create a video upload platform using the popular Ruby on Rails web framework. I have never done a multi-part series before so I thought I would take a stab at it using a small project I did in my spare time. This series might go slow since I have limited time to write these, but hopefully it will be informative.

The small project I was working on was attempting to create a video upload platform using Ruby on Rails. The app would allow you to upload videos and would play them back using Adaptive Bitrate and HLS techniques to help adjust to changing bandwidth requirements. One other thing I added for fun, was a small Node.js server that handles and transcoded videos On-The-Fly when it could, or would fallback to the normal post transcoding process. This allowed the app to receive the upload and transcode at the same time, reducing the amount of time the user had to wait. Since uploading videos has a lot of idle time, why not use that to do some more work.

This walk through will hopefully try and reattempt the work I did with that project and hopefully someone can find fun with it.

We will assume you have a basic rails environment set up and can create new Rails apps:

rails new VideoSite

Let it do its stuff and then lets go into the project.

cd VideoSite

At this point, we have a freshly baked Ruby on Rails application. We need a place where we can upload some videos. We will use the popular Carrierwave gem for handling our uploads. Lets add that to our project and bundle the project:

# Gemfile

gem 'carrierwave'
bundle install

Next we need to create the Uploader using the Carrierwave generator.

rails generate uploader Video

Great. Next lets go ahead and create our controller/model/views for our videos pages and then migrate our database.

rails generate scaffold Video title:string file:string
rake db:migrate

Before we can start uploading videos however, we need to attach the uploader to our video model. Open up app/models/video.rb and change it as follows.

class Video < ApplicationRecord
  mount_uploader :file, VideoUploader
end

Now we can fire up our rails application and upload some videos! Start your rails server with rails s and then navigate to http://localhost:3000/videos/new and you should see our amazing video page.

In order to actually select a video file, we need to update the view to render a file_field instead of a text_field as well as allow multipart uploads. Lets open up the app/views/videos/_form.html.erb file and change it to the following.

<%= form_with(model: video, local: true, html: { multipart: true }) do |form| %>
  <% if video.errors.any? %>
    <div id="error_explanation">
      <h2><%= pluralize(video.errors.count, "error") %> prohibited this video from being saved:</h2>

      <ul>
      <% video.errors.full_messages.each do |message| %>
        <li><%= message %></li>
      <% end %>
      </ul>
    </div>
  <% end %>

  <div class="field">
    <%= form.label :title %>
    <%= form.text_field :title, id: :video_title %>
  </div>

  <div class="field">
    <%= form.label :file %>
    <%= form.file_field :file, id: :video_file %>
  </div>

  <div class="actions">
    <%= form.submit %>
  </div>
<% end %>

We should now be able to choose files and upload them!

Go ahead and select a video and click the Create Video Button. You should then see something like this.

This isn’t really all that fun since we cannot see the video, just the path to it. Lets fix that by using the HTML video tag. Open up the app/views/video/show.html.erb file and change it to the following and then reload the page and you should see your video playing.

<p id="notice"><%= notice %></p>

<p>
  <strong>Title:</strong>
  <%= @video.title %>
</p>

<p>
  <strong>File:</strong>
  <video controls width="640" height="480" src="<%= @video.file %>"></video>
</p>

<%= link_to 'Edit', edit_video_path(@video) %> |
<%= link_to 'Back', videos_path %>

Congratulation! You have the beginning of your very own video uploading service. If you try to load this in other browsers, you may run into problems however, since not all browsers are capable of playing all formats all the time. Another issue is that some web servers will send the entire video file down to the client, which we do not want. It would be a lot nicer if only the part of the video we request is what we receive, continuously. In the next part, we will continue to expand on our simple video uploading by adding some fancy transcoding techniques and use some front end tools that will help us render on all browsers, including mobile and stream smaller chunks of video at a time.

Hope this was fun. Take a look at Part II next!

How to create a Sidekiq service application without Rails

Sometimes you want to create a small Sidekiq service to process requests, without all the extra bloat (and memory usage) from a Rails framework. It turns out that creating such service is not all that hard to do. Create your application using the folders and files below as your starting point.

Gemfile

# Gemfile
source 'https://rubygems.org'
ruby "2.5.0"
git_source(:github) do |repo_name|
  repo_name = "#{repo_name}/#{repo_name}" unless repo_name.include?("/")
  "https://github.com/#{repo_name}.git"
end

gem "sidekiq"

config/sidekiq.yml

---
:concurrency: <%= ENV["CONCURRENCY"] || 25 %>
:queues:
 - default

config/application.rb

# config/application.rb

ENV["BUNDLE_GEMFILE"] ||= File.expand_path("../../Gemfile", __FILE__)

require "bundler/setup" if File.exist?(ENV["BUNDLE_GEMFILE"])
Bundler.require

ENV["RACK_ENV"] ||= "development"

module Example
 class Application
   def self.root
     @root ||= File.dirname(File.expand_path('..', __FILE__))
   end

   def self.env
     @env ||= ENV["RAILS_ENV"] || ENV["RACK_ENV"] || ENV["ENV"] || "development"
   end

   def self.logger
     @logger ||= Logger.new(STDOUT)
   end
 end
end

require_relative "initializers/sidekiq"

config/initializers/sidekiq.rb

# config/initializers/sidekiq.rb

Sidekiq.configure_server do |config|
  config.redis = { url: ENV["REDIS_URL"] }
end

app/workers/my_worker.rb

# app/workers/my_worker.rb

class MyWorker
  include Sidekiq::Worker

  def perform(*args)
    # Do work here
  end
end

Once you have created those files, then you can run the following on the command line:

bundle exec sidekiq -e ${RACK_ENV:-development} -r ./config/application.rb -C ./config/sidekiq.yml

If you want to enqueue jobs from another application using Sidekiq, its as easy as:

Sidekiq::Client.enqueue_to "default", MyWorker, "param_1" => "1", "param_2" => "2"

When you have all this working, then you can start adding things like your database connections and other gems and code to the worker. Let me know if this helps anyone or if you run into any problems!